 Instrumentiverse
Introduction to DAW Automation for Modern Beats
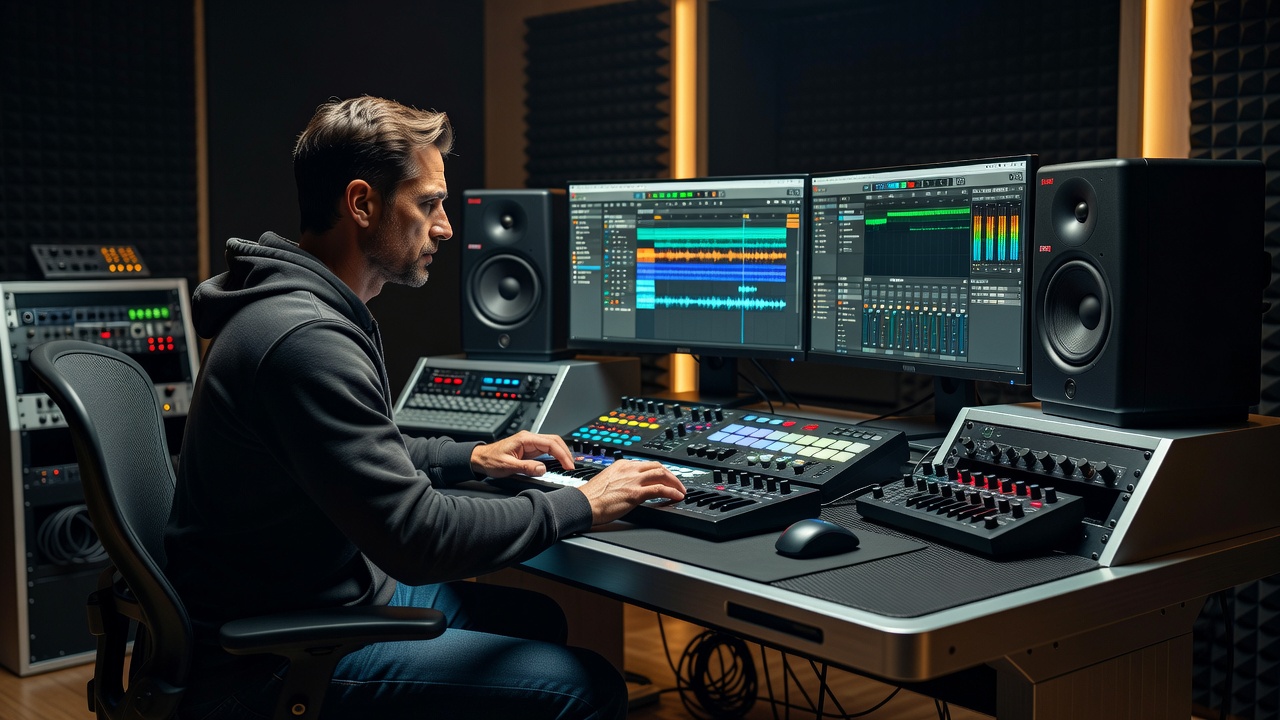
Automation remains one of the most powerful tools in any digital audio workstation for transforming static loops into breathing, professional-sounding tracks. In 2026, producers continue to rely on volume, pan, and effect parameter automation to add movement and depth that static MIDI or audio clips simply cannot achieve. This guide focuses on practical techniques in Ableton Live and FL Studio that go well beyond basic fader rides. Intermediate producers often struggle with making beats feel alive across an entire arrangement. The secret lies in targeted automation lanes that evolve over time, responding to the energy of the track. Whether you are building tension in a breakdown or adding subtle groove variations in a drop, these methods deliver results quickly. Automation also helps differentiate your productions in a crowded market where listeners expect constant sonic evolution rather than repetitive patterns.
Understanding the fundamentals starts with recognizing that automation is not merely a mixing afterthought. It serves as a compositional tool that can define the structure of your beat from the first bar. By modulating parameters over time, you create narrative arcs within instrumental music, guiding the listener through intros, builds, peaks, and breakdowns without relying solely on new MIDI notes or sample changes.
Core Automation Types: Volume, Pan, and Effects
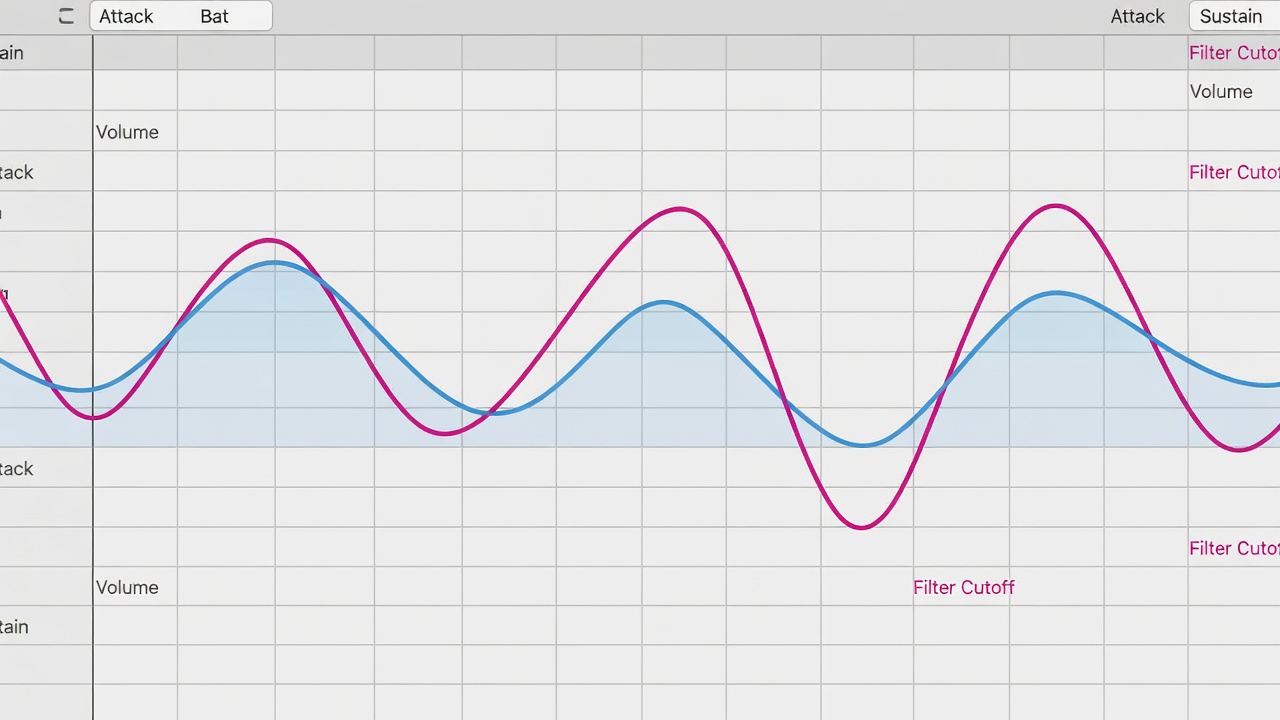
Volume automation controls the perceived loudness of individual elements, allowing kicks to punch harder during builds or hi-hats to recede for space. For example, automate a snare track to rise 3 dB over four bars to create anticipation before a drop. Pan automation creates width and movement, sending percussion from left to right in rhythmic patterns. Imagine panning a shaker gradually from center to 70% right over eight bars while a complementary shaker moves left, producing a swirling stereo effect. Effect automation, such as filter cutoff or reverb decay, introduces timbral shifts that keep listeners engaged. Automating the resonance on a low-pass filter applied to a synth pad can turn a simple chord into a sweeping atmospheric layer that thickens during verses and thins out in choruses.
Start by recording automation in real time while listening to your loop. This captures natural human timing that grid-locked drawing sometimes lacks. Once recorded, fine-tune breakpoints for precision. Always work in small sections first before expanding to the full arrangement to maintain control and avoid overwhelming your mix bus.
Ableton Live Automation Workflow
In Ableton Live 12, enable automation mode by clicking the A button in the arrangement view. Select a track and choose parameters from the device dropdown. For volume, automate the track volume slider directly. Pan works similarly by targeting the pan knob. For effects, load a stock plugin such as Auto Filter or Echo. Click the parameter you wish to automate, then draw or record the lane. A common technique involves automating filter resonance to create sweeping tonal changes on synth stabs during the second half of an eight-bar loop. You can also use the Envelope Follower device to link one parameter to another dynamically, such as tying reverb wet level to incoming kick transients for rhythmic pulsing.
Another advanced move is automating macro controls within a rack. Group several effects together and map multiple parameters to a single macro knob, then automate that macro for complex, synchronized changes. This approach keeps your session organized while delivering rich movement across multiple plugins simultaneously.
FL Studio Automation Workflow
FL Studio 21 offers robust automation via the Channel Rack and Mixer. Right-click any knob or fader and select Create Automation Clip. This generates a dedicated clip in the playlist where you can shape curves with the pencil or freehand tools. Pan automation is achieved the same way on mixer channels. For effects, automate parameters inside plugins like Fruity Delay 3 or Maximus. Producers often automate the mix knob on a reverb send to bring in space only on specific snare hits, creating a pulsing atmosphere that evolves across sections. You can also use the formula controller to generate mathematical curves for precise LFO-style automation without additional plugins.
FL Studio’s playlist allows you to stack multiple automation clips on the same track lane, making it simple to create layered movements such as simultaneous volume dips and filter sweeps. Experiment with different curve types, including S-curves for smoother transitions during build-ups.
5-Step Automation Checklist for Dynamic Beats
- Map your most important parameters first: volume, filter cutoff, and send levels.
- Record initial passes while the track plays to capture musical timing.
- Refine breakpoints using snap-to-grid only where rhythmic precision matters.
- Layer multiple automation lanes on the same track for compound movement.
- Listen in context at multiple playback volumes to ensure changes translate.
Following this checklist prevents over-automation and keeps focus on musical intent rather than technical complexity. After completing the steps, bounce a short reference mix and compare it to your original static version to quantify the improvement in perceived energy and professionalism.
Real-World Example: Automating a Trap Beat
Consider a typical trap beat with rolling hi-hats, punchy 808s, and crisp snares. Begin with volume automation on the 808 to create a slow swell across 16 bars, peaking just before the snare roll. Next, apply pan automation to the hi-hat rolls, moving them from left to right in time with triplet rhythms. For effects, automate the cutoff frequency on a low-pass filter over the entire drum bus, opening it gradually during the transition into the main hook. This combination produces a sense of forward motion that feels cinematic and keeps the beat from becoming monotonous even after repeated listens.
Comparing Ableton Live and FL Studio Methods
Ableton excels at clip-based automation within Session View, making it easy to trigger evolving variations on the fly during live performance or arrangement sketching. FL Studio’s strength lies in its playlist automation clips that remain fully editable and can be reused across multiple projects with drag-and-drop efficiency. Many producers prefer Ableton for rapid effect chaining because device racks allow macro controls that can themselves be automated. FL Studio users often highlight the visual clarity of its automation lanes when working with dense percussion layers. Both approaches achieve professional results when applied thoughtfully. The choice ultimately depends on your workflow preference: Ableton favors spontaneous creativity while FL Studio rewards meticulous visual editing and pattern reuse.
For more official guidance, consult the Ableton website and the Image-Line FL Studio resources. Additional production insights are available at Sound on Sound.
Common Pitfalls and How to Avoid Them
One frequent mistake is automating too many parameters simultaneously, which muddies the mix. Limit yourself to three or four lanes per section initially. Another issue arises from mismatched automation resolution after software updates; always verify that your project sample rate matches the automation rate in 2026 versions of both DAWs. Over-reliance on linear ramps can sound mechanical. Use bezier curves or freehand drawing to introduce organic variation instead. Finally, forgetting to disable automation when bouncing stems leads to unexpected level changes later in the mixing stage. To avoid this, create a dedicated automation bypass group or render critical tracks to audio once you are satisfied with the movement.
Troubleshooting Automation Glitches in 2026 Updates
After recent DAW updates, some users report automation lanes disappearing or parameters failing to respond. Reset the plugin to factory defaults and re-map the automation. If latency occurs, increase buffer size temporarily while editing, then revert for final playback. Check for conflicting third-party plugin versions and update them through their respective manufacturers. In rare cases, clearing the plugin cache or creating a new project and importing tracks individually resolves persistent glitches.
Frequently Asked Questions
How do I automate multiple parameters on one plugin at once?
Most DAWs allow multiple lanes to be visible simultaneously. In Ableton, use the Show Automation lanes button. In FL Studio, simply create additional automation clips for each parameter.
Can automation cause CPU spikes?
Yes, especially with dense effect automation. Freeze tracks or render automation to audio when the project becomes heavy.
What is the best way to copy automation between tracks?
Use copy and paste functions on automation lanes or save automation presets where supported by your DAW.
How should I handle automation after a major DAW update?
Always test your existing projects in the new version on a duplicate file first. Re-map any broken parameters and check release notes for changes to automation engines.
Conclusion
Mastering DAW automation transforms ordinary beats into dynamic, professional productions. By focusing on volume, pan, and effect workflows with clear step-by-step processes, comparing Ableton and FL Studio strengths, and avoiding common pitfalls, you gain reliable tools that elevate your music in 2026 and beyond. Apply the checklist consistently and experiment with subtle changes to discover your signature sound. The techniques covered here provide a foundation you can build upon for years, ensuring your beats remain fresh and engaging regardless of evolving production trends.


No comments yet. Be the first!