 Instrumentiverse

Introduction to Safe Violin Playing in 2026
Learning the violin starts with building healthy habits that protect your body for years of enjoyable practice. In 2026, emphasis on ergonomic techniques helps beginners avoid common strains and develop confident playing form from day one. This comprehensive guide covers violin hold setup, shoulder and chin rest adjustments, left-hand thumb placement, right-hand bow grip with curvature tips, daily warm-up routines, common mistakes that cause strain, ergonomic tool recommendations, and practical examples for comfortable long-term lessons. Whether you are a child, teen, or adult beginner, focusing on injury prevention ensures you can enjoy violin lessons without discomfort interrupting your progress.
Setting Up Your Violin Hold
Proper violin hold forms the foundation of safe playing. Stand or sit with your spine straight and shoulders relaxed. Hold the violin parallel to the floor at a slight angle toward your left shoulder. The instrument should rest lightly against your collarbone without forcing your neck forward. For example, beginners often start by practicing the hold without the bow for five minutes daily to build endurance. Practice this position in front of a mirror to check alignment and make small adjustments until it feels natural. Adults may need a slightly lower angle than younger students to accommodate different arm lengths, while children benefit from smaller instruments sized to their body to maintain neutral posture.
Adjusting Shoulder and Chin Rests for Ergonomics
Shoulder and chin rests are essential ergonomic tools that customize fit and reduce tension. Choose a shoulder rest that matches your shoulder height and violin size. Position it so the violin sits level without lifting your left shoulder. Chin rests should allow your jaw to rest gently without tilting your head. Test different models in a music store to find one that supports neutral neck posture. Many players benefit from adjustable options that accommodate growth or personal anatomy. Compare sponge-style rests for soft cushioning versus rigid adjustable models for precise height control; the right choice depends on your shoulder width and playing style. Players with longer necks often prefer higher rests, while those with shorter necks select flatter designs to avoid overextension.
Left-Hand Thumb Placement Techniques
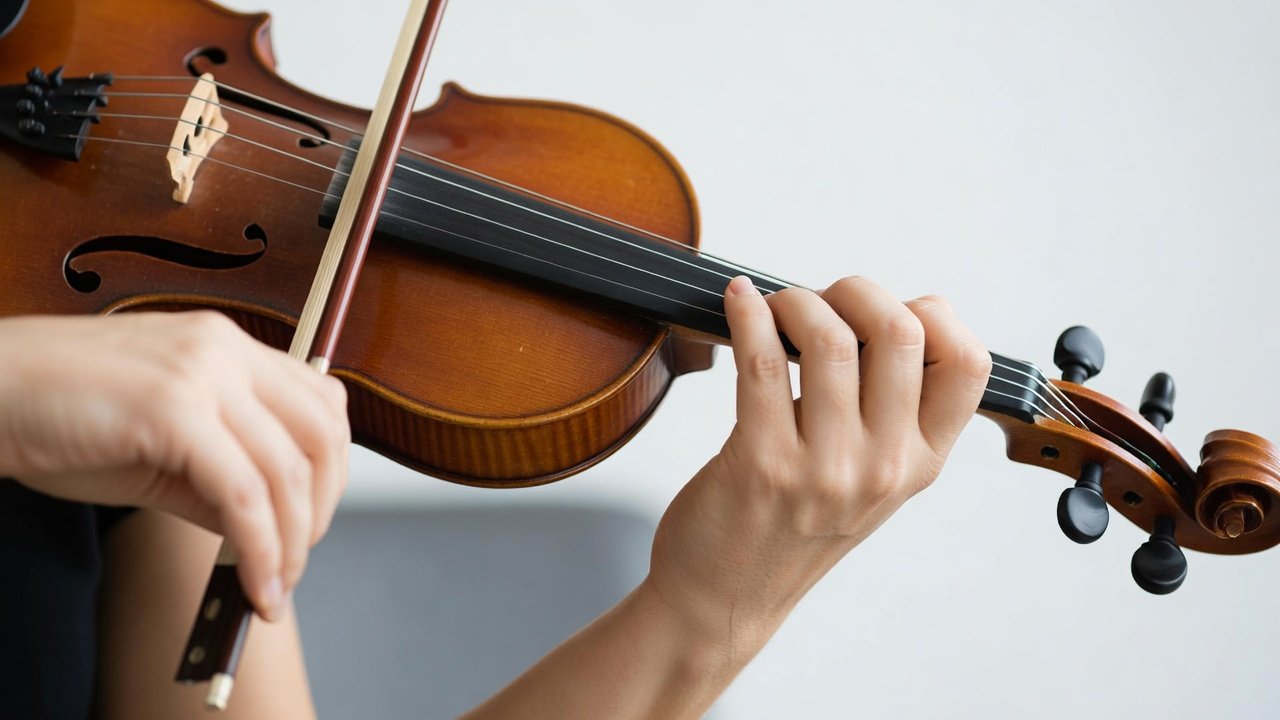
Your left-hand thumb provides support without gripping tightly. Place it opposite your first or second finger on the back of the neck, keeping the thumb relaxed and slightly curved. Avoid wrapping it around the neck or pressing hard, which can cause wrist strain. Practice shifting between first and third positions while maintaining this light contact to build muscle memory for fluid movement. For instance, during a simple C major scale exercise, focus on releasing thumb pressure between notes. This technique prevents the common error of a locked thumb that leads to tension traveling up the forearm. Over time, correct placement allows smoother vibrato introduction without discomfort.
Right-Hand Bow Grip and Finger Curvature
A relaxed right-hand bow grip ensures smooth bowing and prevents hand fatigue. Hold the bow with the thumb bent at the first joint and fingers curved naturally over the stick. The pinky rests lightly on top for balance. Keep the wrist flexible and the elbow at a comfortable height. Curved fingers allow subtle adjustments during up and down bows, promoting control without tension. Beginners should practice open-string exercises to refine this grip. A practical example involves bowing on the open A string for thirty seconds while checking that the index finger maintains gentle contact rather than squeezing. Curvature tips include avoiding a flat hand position, which restricts bow speed and causes early fatigue during longer practice sessions.
Common Mistakes That Cause Strain
- Tightening the shoulders or neck during play, which restricts breathing and leads to upper back pain
- Over-gripping the bow or violin neck, resulting in tendon strain over repeated sessions
- Using an ill-fitting chin or shoulder rest that forces unnatural head or shoulder elevation
- Practicing without breaks, leading to repetitive stress injuries in the wrists and elbows
- Ignoring early signs of discomfort in wrists or back, allowing minor issues to develop into chronic problems
- Slouching while seated, which misaligns the entire spine and affects bow arm freedom
Recognizing these errors early helps you correct form and maintain comfort during lessons. Many students report improvement within two weeks of addressing just one or two of these habits through mindful practice.
Recommended Ergonomic Tools
Quality ergonomic accessories support safe habits. Look for padded shoulder rests with adjustable height and padded chin rests made from hypoallergenic materials. Some players add gel pads for extra cushioning. Consult a teacher or luthier for personalized recommendations based on your body type and instrument. When selecting tools, consider breathable fabrics to prevent skin irritation during extended sessions and lightweight materials that do not add unnecessary weight to the violin setup.
Daily Warm-Up Routines for Violinists
Incorporate short warm-ups before every session to prepare muscles and joints. Start with gentle neck rolls and shoulder shrugs for two minutes. Then play long open-string bows focusing on relaxed posture. Follow with slow scales emphasizing light finger pressure and curved bow hold. End with stretches for the wrists and forearms. A consistent 10-minute routine reduces injury risk and improves focus. For a more detailed example, try this sequence: minute one through two for shoulder mobility, minutes three to five for open D and A string long tones, minutes six to eight for first-position scales at a slow tempo, and minutes nine to ten for wrist circles and finger extensions. Repeat this daily to notice better posture awareness within a month.
Building a Practice Schedule for Injury Prevention
Structure your practice to include rest intervals. Aim for twenty-five minutes of focused playing followed by a five-minute break to stand, stretch, and reset posture. This Pomodoro-style approach helps maintain concentration while protecting joints. Track your sessions in a simple notebook to identify patterns, such as increased discomfort after longer periods without breaks.
Recognizing Early Signs of Strain and When to Seek Help
Pay attention to persistent soreness, tingling, or reduced range of motion. If symptoms last beyond a day or two, consult a music medicine specialist or physical therapist familiar with musicians. Early intervention often resolves issues quickly and prevents longer interruptions to your violin lessons.
Frequently Asked Questions About Discomfort
What should I do if my neck hurts during practice?
Stop immediately, check your chin and shoulder rest fit, and ensure your head remains upright. Resume only after adjusting posture and taking a short break. Persistent neck pain may indicate the need for a different rest model or professional guidance.
How can I prevent wrist pain from left-hand positioning?
Keep your thumb relaxed and opposite your fingers. Practice scales slowly while monitoring thumb pressure, and consider consulting a teacher for form checks. Incorporating gentle wrist stretches after each session further reduces risk.
Are there stretches that help after playing?
Yes, gentle wrist flexor stretches and shoulder openers performed daily improve flexibility. Always move within a pain-free range and hold each stretch for twenty to thirty seconds.
How long should beginners practice each day to avoid strain?
Start with fifteen to twenty minutes and gradually increase as comfort allows. Quality of practice with correct posture matters more than duration.
Conclusion
Mastering safe posture and hand positioning sets the stage for rewarding violin lessons in 2026 and beyond. By focusing on ergonomic setup, correct grips, warm-ups, avoiding common pitfalls, and structured practice schedules, beginners build sustainable skills. Consistent attention to body alignment supports injury prevention and enjoyable music-making. For more health guidance, visit Mayo Clinic or explore resources at National Institutes of Health and Centers for Disease Control and Prevention. Start your next practice session with these principles for lasting comfort and steady improvement.

No comments yet. Be the first!