 Instrumentiverse
Introduction to Vibrato on the Violin
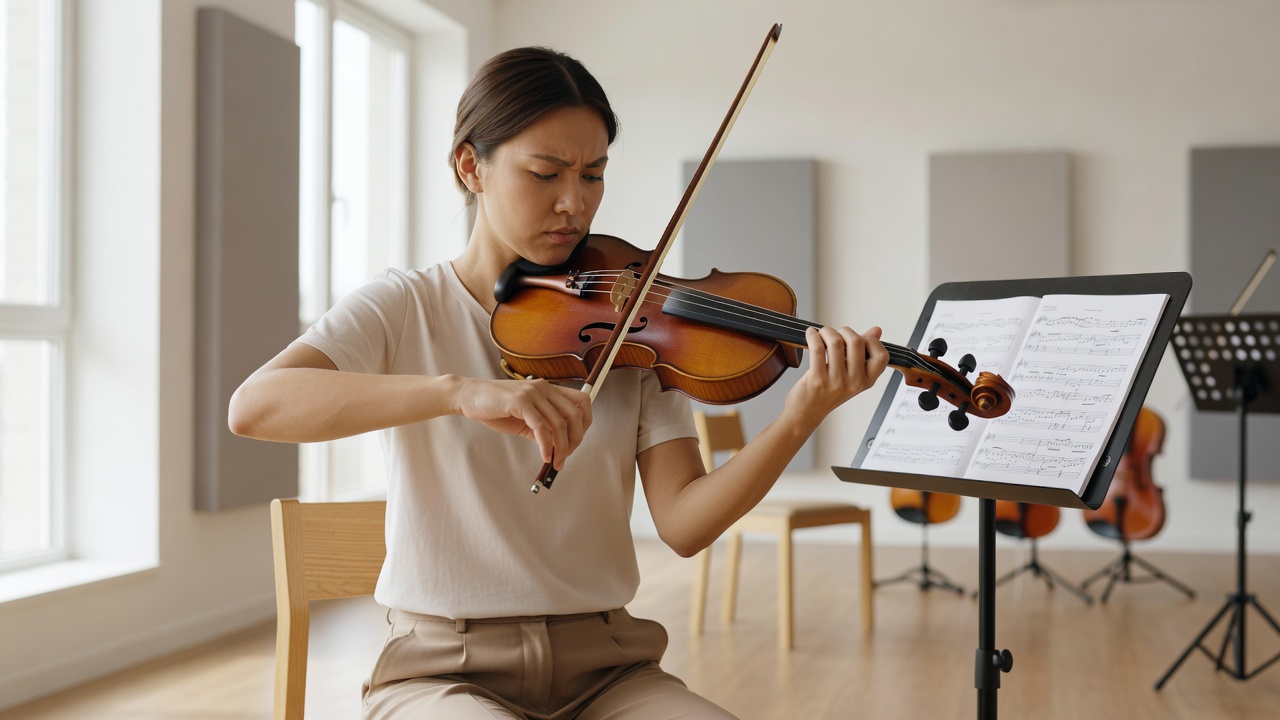
Vibrato is a fundamental technique that transforms basic violin notes into emotionally resonant sounds. For beginners who have already mastered finger positions and basic bow strokes, vibrato represents the next milestone in developing an expressive tone. This comprehensive guide focuses on practical methods to build control, comparing wrist and arm approaches while providing actionable exercises and a structured schedule. Vibrato adds depth and humanity to every phrase, turning mechanical scales into singing melodies that connect with listeners on an emotional level.
Understanding the Basics of Vibrato
Vibrato involves a controlled oscillation of pitch around a central note, created by subtle movements of the left hand and arm. It adds warmth and emotion, making melodies sing. Proper vibrato requires relaxation in the hand, wrist, and arm to avoid tension that can stifle sound quality. The motion should feel natural and fluid rather than forced, with the finger remaining anchored on the string while the hand or arm supplies the oscillation. Beginners often struggle with speed consistency, so starting at very slow tempos helps develop muscle memory before increasing the rate.
Posture and Setup for Effective Vibrato
Before any oscillation begins, ensure your overall posture supports free movement. Stand or sit with shoulders relaxed and the violin held at a comfortable angle. The left elbow should be positioned slightly under the instrument to allow the hand to move without strain. A common starting point is to practice in front of a mirror to observe any unnecessary tension in the neck or fingers.
Wrist Vibrato Versus Arm Vibrato
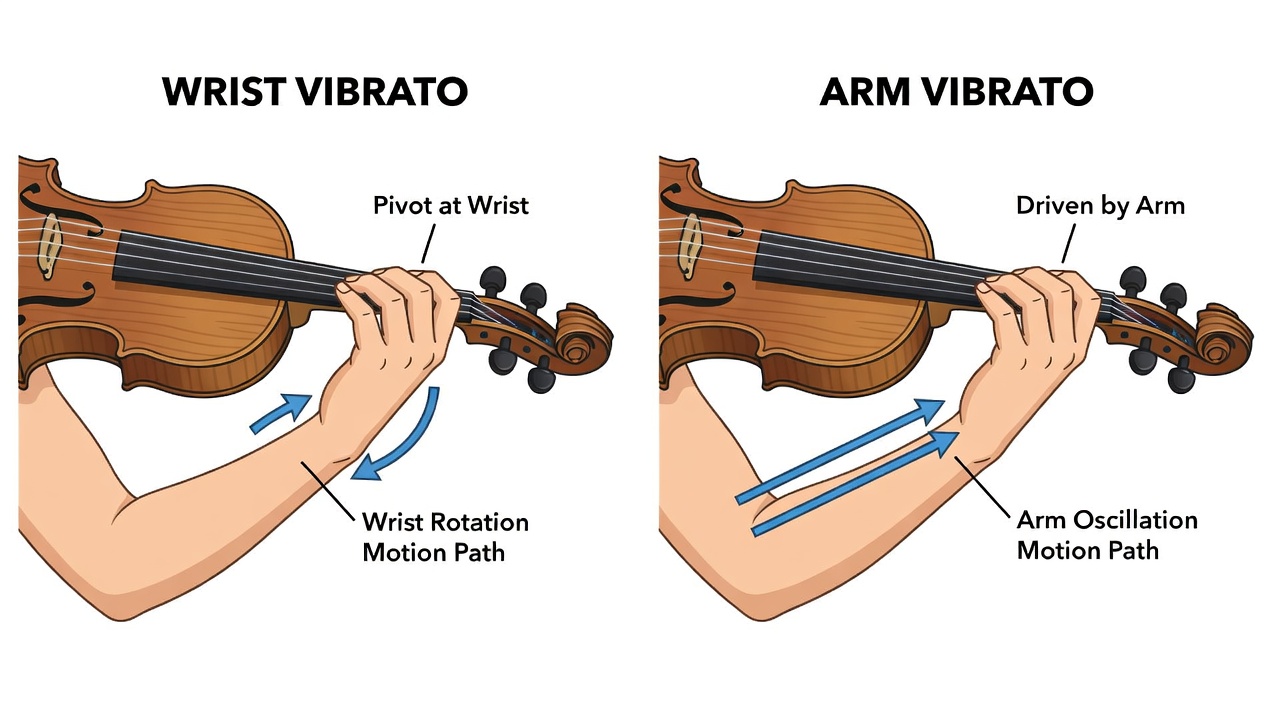
Two primary styles exist: wrist vibrato and arm vibrato. Wrist vibrato relies on pivoting motions from the wrist for a narrower, quicker oscillation suited to classical pieces. Arm vibrato uses larger forearm movements for a broader, slower effect ideal in romantic or folk genres. Beginners often start with wrist vibrato for finer control before progressing. The choice between styles depends on the musical context and the desired emotional intensity. Wrist vibrato tends to produce a more refined, contained sound, while arm vibrato can fill larger spaces with richer color.
Step-by-Step Exercises for Developing Control
Begin with open strings to focus purely on motion without pitch concerns. Place your hand in position and rock the wrist gently while maintaining a steady bow. Gradually introduce stopped notes on scales like G major. Practice slow oscillations at 60 beats per minute, increasing speed as control improves. Record yourself to monitor evenness and pitch accuracy. A useful variation is the “pulse exercise,” where you alternate between straight tone and vibrato on the same note to hear the contrast clearly. Another drill involves playing long tones on each finger while varying the width of the oscillation from narrow to wide and back again.
Advanced Variations on Basic Exercises
Once basic rocking feels comfortable, try combining vibrato with dynamic changes. Play a sustained note starting with no vibrato, then gradually introduce it while increasing bow pressure. This teaches coordination between left and right hands. Use a metronome set to 40 beats per minute for quarter-note oscillations, then double the subdivisions as you gain confidence. Specific examples include applying these drills to the first octave of the G major scale, holding each note for four beats before moving to the next.
4-Week Practice Schedule
- Week 1: Focus on relaxation drills and 10-minute wrist vibrato sessions twice daily on open strings. Spend the first five minutes simply moving the wrist without the bow to build the motion, then add the bow for the remaining time.
- Week 2: Introduce arm vibrato on scales, alternating styles for 15 minutes per session. Include five minutes of slow motion practice followed by ten minutes of gradual acceleration.
- Week 3: Combine techniques in simple melodies, aiming for 20-minute focused practices. Choose pieces like “Twinkle Twinkle Little Star” variations and mark where vibrato should appear on sustained notes.
- Week 4: Integrate vibrato into etudes and review for consistency, with daily 25-minute sessions. Record one full practice each week to track progress and identify areas needing refinement.
Integrating Vibrato with Basic Scales
Apply vibrato to major and minor scales starting at moderate tempos. Use it on longer notes first, then incorporate into arpeggios. This builds seamless transitions between notes while enhancing overall intonation awareness. For example, in the A minor scale, hold the E and A notes for four beats each with a steady vibrato rate of approximately six oscillations per second. Over time, extend this to every note in the scale, ensuring the vibrato width remains even and does not pull the pitch sharp or flat.
Comparisons of Vibrato Styles Across Musical Genres
Classical music often favors subtle wrist vibrato for precision, as heard in works by Bach or Mozart. Jazz and blues lean toward wider arm vibrato for expressive bends. Folk traditions may blend both for emotional depth. Experimenting across genres helps violinists adapt their tone effectively. In Baroque repertoire, a light wrist vibrato suits the period style, whereas Romantic concertos benefit from a fuller arm motion to match the orchestra. Listening to recordings by different artists reveals how vibrato choices shape interpretation and emotional impact.
Common Pitfalls to Avoid and Troubleshooting Tension
Excessive pressure or stiff shoulders leads to uneven vibrato. Always warm up with stretches. If tension arises, pause and reset posture. FAQs include: How fast should vibrato be? Start slow and build naturally. When to use it? On sustained notes for emotional emphasis. Another frequent issue is squeezing the neck of the violin with the left hand; combat this by consciously relaxing the thumb every few minutes. If the sound becomes wobbly, reduce the width of the oscillation until control returns.
Expanded Troubleshooting Guide
When vibrato feels locked or jerky, check finger placement. The finger pad should contact the string at a slight angle rather than pressing flat. Practice “ghosting” the motion without pressing the string down fully to isolate the hand movement. Persistent tension in the forearm often stems from gripping the bow too tightly on the right side; balance both hands by practicing vibrato passages with very light bow strokes first.
For further reference on string instrument techniques, explore resources from Britannica and AllMusic. Additional guidance on practice routines appears on authoritative music education sites.
Conclusion
Mastering vibrato elevates violin playing from mechanical to musical. Consistent practice with the outlined exercises and schedule will yield noticeable improvements in expressive tone within weeks. Remember that every player develops at their own pace, so patience and regular listening to professional performances remain essential companions on the journey.

No comments yet. Be the first!