 Instrumentiverse
Introduction to Multi-Interface Guitar Workflows in 2026
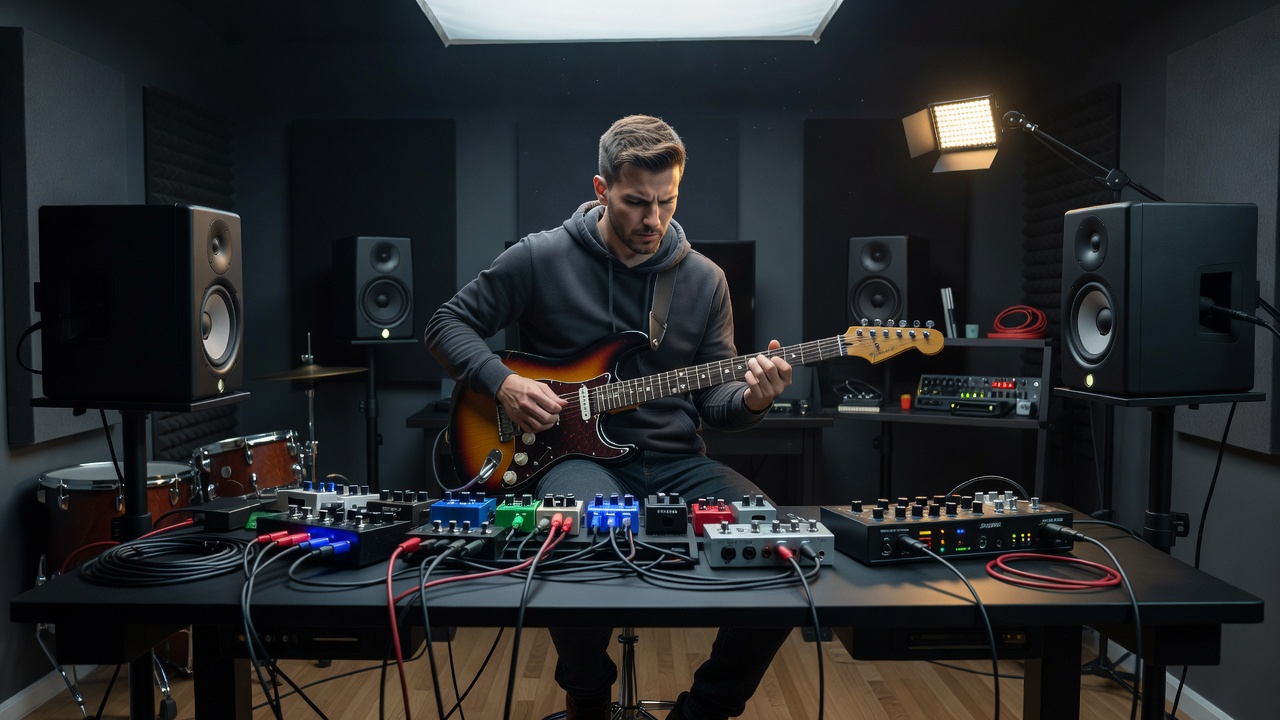
Guitarists in professional home studios increasingly rely on hybrid analog-digital chains that combine physical pedals with software plugins across multiple audio interfaces. This setup delivers tone consistency while maximizing workflow efficiency. In 2026, plugin reviews must address real integration challenges rather than basic feature lists, helping users maintain low-latency performance and seamless signal paths when managing pedals, interfaces, and studio monitors simultaneously. Many players now run one interface dedicated to capturing raw guitar tones or pedal outputs while the second handles plugin processing and monitor feeds, creating a flexible environment that supports both live tracking and detailed mixing without constant recabling.
Modern guitarists often route signals through one interface for direct monitoring and another for plugin processing, paired with studio monitors for accurate playback. This article examines plugin selection, troubleshooting, and practical examples tailored to these advanced configurations, offering decision-useful details for optimizing gear in home studios where space and budget constraints demand smart integration.
Understanding Multi-Interface Guitar Setups
Multiple interfaces allow separate handling of analog pedal chains and digital plugin layers. One interface might capture the guitar's raw signal or pedal output, while the second manages plugin-heavy monitoring through studio monitors. This separation reduces CPU strain and preserves analog warmth before digital conversion, which proves especially valuable during long sessions where heat buildup from overdriven pedals can affect tone.
Key benefits include expanded I/O options for complex routing and the ability to A/B test analog versus digital tones without recabling. Users should verify driver compatibility across interfaces to avoid conflicts in DAW sessions, particularly when running Windows or macOS updates that alter audio permissions. Comparing single-interface versus dual setups reveals that the latter often yields cleaner signal paths and more headroom for effects stacking.
Selecting Plugins for Hybrid Analog-Digital Chains
Plugins suited for hybrid setups emphasize low-latency convolution, flexible routing matrices, and amp modeling that responds well to pedal-generated harmonics. Focus on tools offering multi-channel support and external send/return capabilities to integrate with existing pedalboards. Prioritize plugins that include built-in phase alignment tools, as mismatched timing between analog and digital stages frequently leads to thin or hollow tones.
Look for plugins with robust MIDI control for switching between analog and digital paths. Real-world testing shows that plugins supporting sidechain inputs excel when blending pedal overdrive with digital modulation effects. For instance, routing a fuzz pedal through a plugin that emulates tape saturation can add warmth without losing the pedal's aggressive attack, creating a signature sound used in many modern rock productions.
Practical examples include routing a tube screamer pedal into an interface, then applying a plugin-based delay that syncs to the DAW clock without introducing phase issues. When evaluating options, test how each plugin handles varying input levels from different pedals to ensure consistent output across dynamic playing styles.
Latency Troubleshooting Across Interfaces
Latency remains a primary concern in multi-interface environments. Start by aligning sample rates and buffer sizes on both devices. Use the DAW's multi-device aggregate feature where supported, or dedicate one interface solely to monitoring. Experiment with different USB ports or Thunderbolt connections to identify the lowest stable latency configuration for your specific computer hardware.
Common fixes involve disabling unnecessary plugins on the monitoring path and enabling direct monitoring on the primary interface. Test round-trip latency with a click track to ensure it stays under 10ms for comfortable playing. Advanced users can employ ASIO guard or similar buffer optimization tools to further reduce perceived delay during tracking.
If issues persist, update firmware on both interfaces and check USB hub quality, as poor power delivery often exacerbates timing discrepancies. Document each change in a session log so you can revert quickly if new problems arise during a recording session.
Real-World Signal Routing Examples
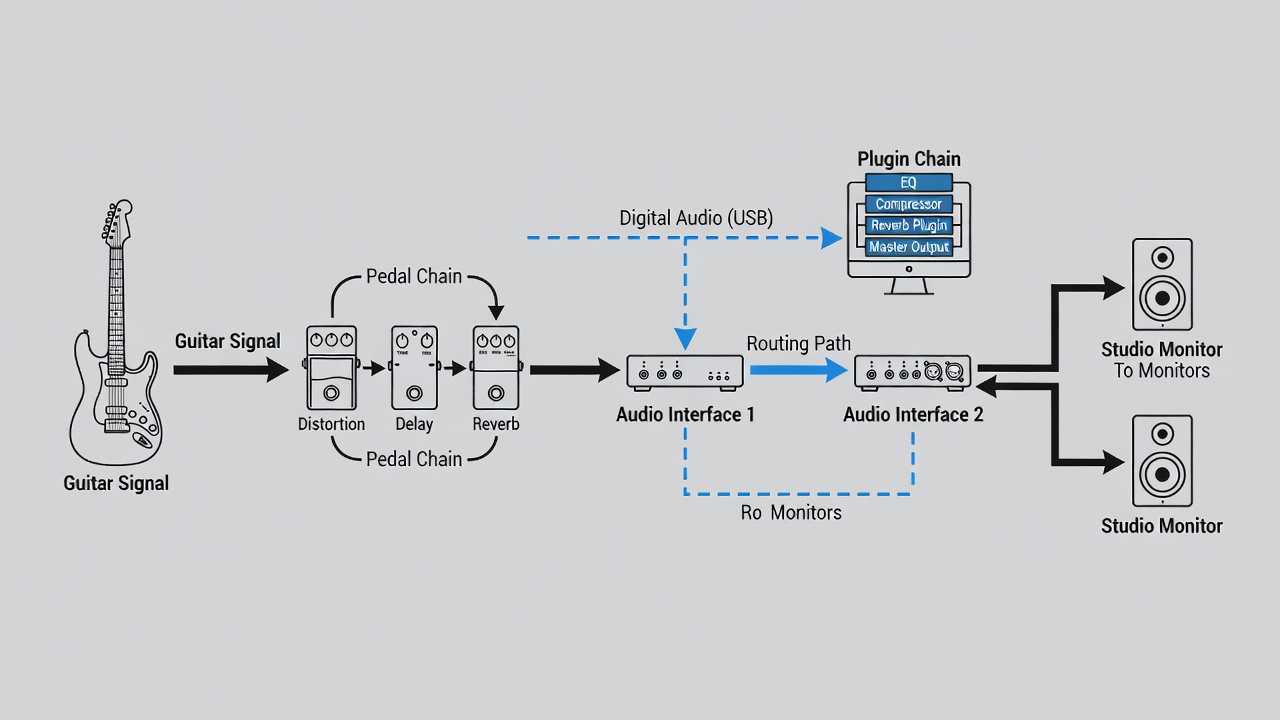
Consider a guitarist using a pedalboard with overdrive and modulation before feeding into Interface A for capture. Interface B then handles plugin processing and monitor output. The signal flows: guitar → pedals → Interface A input → DAW track → plugin chain → Interface B output → studio monitors. This configuration supports parallel processing where a clean DI signal is recorded alongside the effected tone for later re-amping flexibility.
Another example involves parallel routing where the dry pedal signal splits to one interface while a wet plugin-processed version routes through the second for blended monitoring. This technique preserves analog dynamics while adding digital polish. A third scenario uses one interface for guitar and bass pedals simultaneously, with the second managing vocal or drum monitoring, demonstrating how multi-interface setups scale for band rehearsals in a home environment.
Step-by-Step Setup Guides
Follow these steps for a stable multi-interface configuration:
- Connect both interfaces to your computer and confirm they appear in system audio settings.
- Create an aggregate device in your operating system if your DAW supports it.
- Route guitar and pedals to the first interface's inputs, labeling each channel clearly in the DAW.
- Assign plugin outputs and monitor sends to the second interface, testing volume levels incrementally.
- Set buffer sizes consistently and enable direct monitoring where possible to minimize delay.
- Test with a simple plugin chain before layering complex effects, then save the template for future projects.
- Verify monitor placement and acoustic treatment to ensure accurate listening during critical listening phases.
Repeat the process in your specific DAW to fine-tune I/O mappings and create backup routing presets.
A/B Testing Methods for Tone Consistency
Effective A/B testing compares analog pedal tones against plugin emulations. Record the same riff through both paths, then switch between them during playback using mute groups or dedicated tracks. Incorporate reference tracks from commercial releases to benchmark your hybrid sound against professional standards.
Use level-matched comparisons and reference tracks to evaluate frequency response. Focus on transient response and harmonic content to ensure the hybrid chain feels cohesive rather than disjointed. Record multiple takes with slight variations in playing dynamics to identify which path best captures expressive nuances.
Document settings for repeatable results across sessions, adjusting plugin parameters to match pedal voicing as closely as possible. Share test files with collaborators for objective feedback on tone balance.
Common Mistakes to Avoid in Multi-Interface Setups
One frequent error is neglecting proper clock synchronization, which causes clicks and pops during playback. Always designate a master clock source and slave the secondary interface. Another mistake involves overloading USB bandwidth by connecting both interfaces to the same hub; use separate ports or a powered hub rated for audio devices.
Players sometimes overlook grounding loops when mixing analog pedals with digital interfaces, leading to hum that plugins cannot fully remove. Invest time in cable management and consider isolation transformers for problematic connections. Finally, avoid over-processing the monitoring path, as this can mask issues that only appear in final mixes.
FAQ: Common Compatibility Issues
- How do I resolve driver conflicts between two interfaces? Update all drivers to the latest versions and avoid running conflicting control panels simultaneously; restart your DAW after each change.
- What if my pedals introduce noise when routed through plugins? Use noise gates early in the chain and ensure proper grounding between analog and digital stages, checking cable shielding quality.
- Can I use different sample rates on each interface? No—mismatched rates cause dropouts; always synchronize them in the DAW and confirm settings before recording begins.
- Which DAWs handle multi-interface routing best? Most major DAWs support aggregate devices; test your workflow with a trial session before committing to complex projects involving multiple tracks.
- How do I maintain consistent tone when switching between practice and recording modes? Create preset templates that lock routing and plugin settings, then recall them at the start of every session.
Conclusion
Optimizing plugins for multi-interface guitar setups with pedals requires attention to routing, latency, and hybrid tone matching. By following the guides and testing methods outlined, guitarists can achieve professional results in home studios. Continued exploration of new plugin releases will further refine these workflows in the years ahead. For authoritative audio production resources, visit Sound on Sound, Guitar World, and Pro Sound Web.
No comments yet. Be the first!