 Instrumentiverse
Introduction to Proper Finger Placement on Piano
Starting your piano journey in 2026? Mastering finger placement from day one is crucial. Poor habits lead to tension, pain, and stalled progress. This comprehensive guide covers hand positioning, finger numbering, step-by-step instructions for both hands, common errors, daily exercises, and how it all ties into playing simple songs. Whether you're self-teaching or with a tutor, these techniques build a strong foundation for lifelong playing.
Proper technique prevents repetitive strain injuries like carpal tunnel, common among beginners. According to piano educators, correct positioning allows fluid scales, chords, and pieces. We'll break it down simply, with visuals in mind and links to trusted resources.
Why Finger Placement Matters for Beginners
Finger placement isn't just about hitting notes—it's about efficiency and health. Imagine your hands as bridges connecting your brain to the keys. Misplaced fingers create awkward stretches, causing fatigue. Good positioning promotes relaxation, even tone, and speed.
Benefits include:
- Reduced wrist and finger strain
- Better control over dynamics (loud/soft)
- Easier transitions between notes
- Foundation for advanced repertoire
Studies from music conservatories emphasize early technique training. For more on piano ergonomics, check Piano World, a leading resource for players.
Basic Hand Positioning Fundamentals
Relaxed Hand Posture
Sit at the piano with your bench adjusted so your forearms are parallel to the floor. Elbows slightly below keyboard height. Hands should hover like holding a bubble—relaxed but ready.
Key elements:
- Wrists level with keys, not dipping or rising.
- Fingers curved naturally, as if grasping an orange.
- Thumbs aligned with other fingers, pointing slightly inward.
- Knuckles rounded upward for stability.
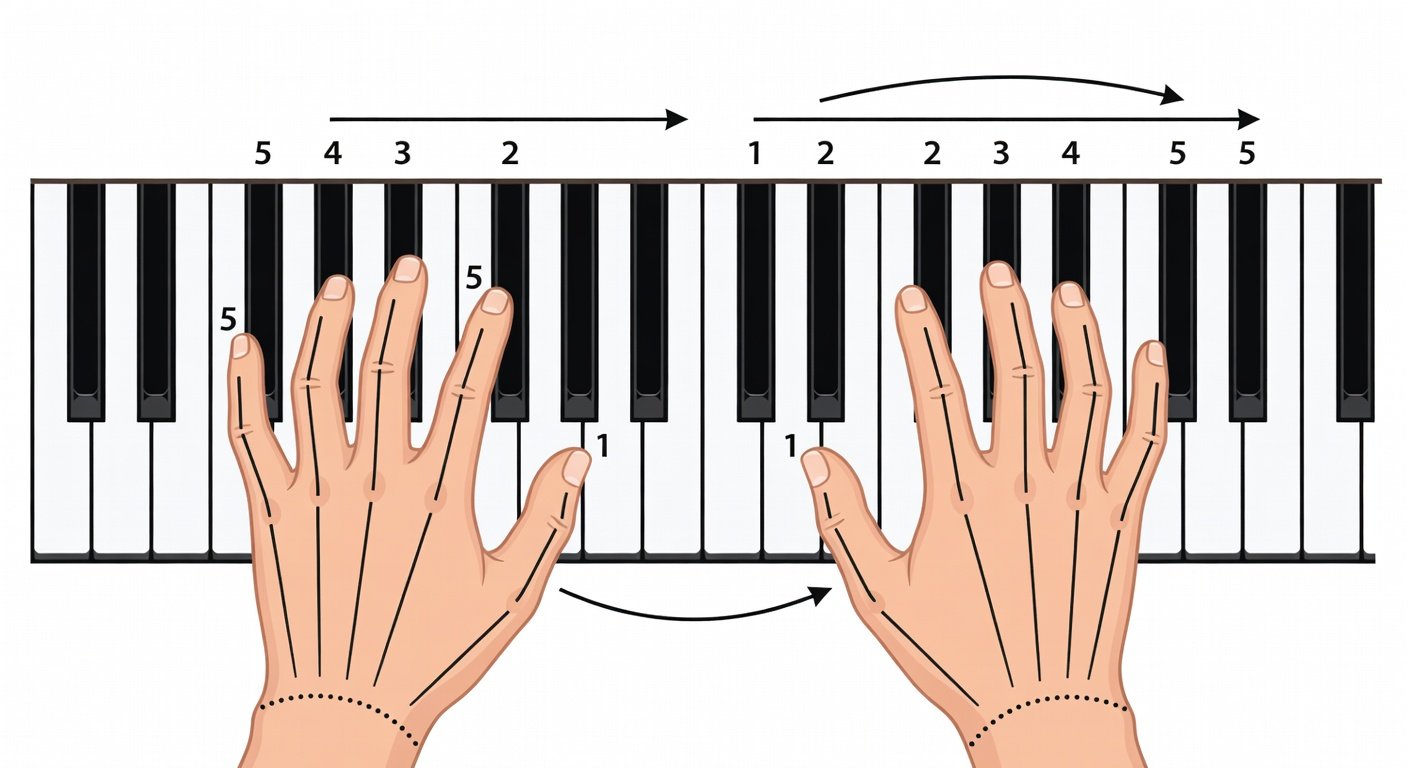
Finger Numbering System
Piano uses a universal numbering: Thumb=1, index=2, middle=3, ring=4, pinky=5. Both hands share this. For right hand in C major scale: 1(C),2(D),3(E),1(F),2(G),3(A),1(B),2(C).
Left hand mirrors but starts differently for scales: 5(C),4(D),3(E),2(F),1(G),3(A),2(B),1(C).
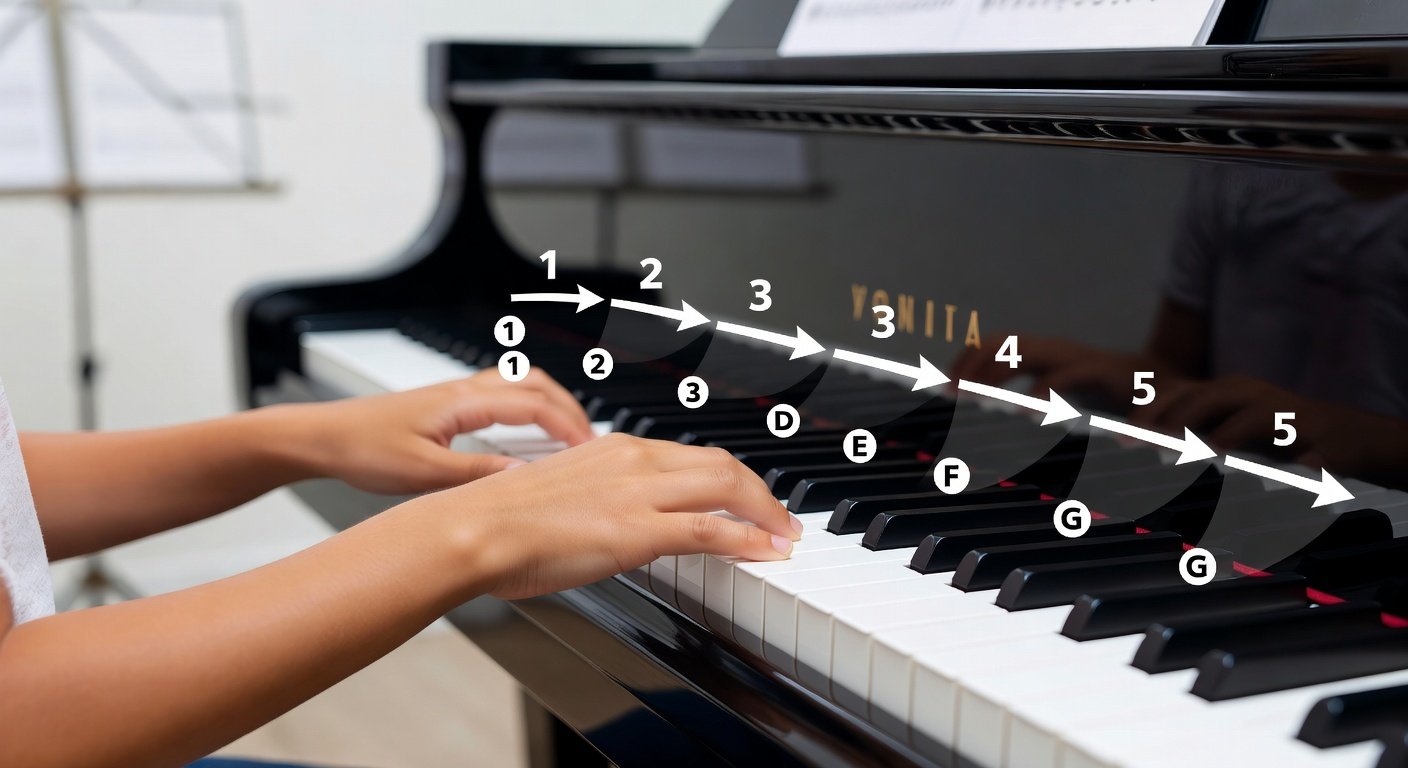
Step-by-Step Finger Placement Guide for Right Hand
Place your right hand on Middle C (C4, group of two black keys).
- Thumb on Middle C: Rest thumb (1) lightly on C white key.
- Index to Pinky: 2 on D, 3 on E, 4 on F, 5 on G.
- Play a five-note pattern: Press sequentially, keeping fingers close to keys.
- Ascend: Thumb under to F (1), continue 2(G),3(A), etc.
- Descend: Tuck pinky under for smooth return.
Practice slowly, 60 BPM metronome. Focus on even pressure—no hammering.
Step-by-Step for Left Hand
Left hand starts an octave lower on C3.
- Pinky on C: 5 on C, 4 on D, 3 on E, 2 on F, 1 on G.
- Ascend: Middle finger (3) over thumb to A, etc.
- Hand shape: Mirror right but palm slightly more open.
- Coordination: Play hands separately before together.
Common Mistakes and How to Fix Them
Beginners often sabotage technique unknowingly. Here's a rundown:
- Tension in wrists: Fix: Shake hands out, roll shoulders. Use mirror to check flat wrists.
- Flat fingers: Splatting keys strains joints. Cure: Practice on table edge, curving fingers.
- Stretched pinky/ring: Weak fingers collapse. Strengthen with spider exercises (crawl fingers across keys).
- Locked elbows: Keep them flexible. Avoid leaning into keys.
- Ignoring thumb tuck: Hesitation breaks flow. Slow practice until smooth.
Avoid these to prevent "piano hand" pain. For injury prevention tips, visit ABRSM, the Associated Board of the Royal Schools of Music.
Daily Exercises to Build Muscle Memory
Dedicate 10-15 minutes daily. Use free sheet music from IMSLP, the International Music Score Library.
Exercise 1: Five-Finger Pattern
- Right hand: C-D-E-F-G, up and down, fingers 1-2-3-4-5.
- Left hand: Mirror.
- Variations: Add dynamics (piano to forte).
Exercise 2: Hanon #1 (Simplified)
Play in C major: Detached notes, focus on evenness. Repeat 10x per hand.
Exercise 3: Thumb Crossings
Scale portions emphasizing 1-3 or 3-1 passes. Record yourself to self-assess.
Exercise 4: Trills and Scales
Trill between 2-3 on each white key. Full one-octave C major scale hands separate.
Progress to contrary motion (hands moving opposite directions).
Applying Finger Placement to Basic Songs
Technique shines in music. Start with:
Mary Had a Little Lamb: Right hand melody uses 3-2-1-2-3-3-3 pattern on E-D-C-D-E-E-E. Left: Simple C-G chord with 1-5.
Ode to Joy: Scale-like runs reinforce thumb under.
Twinkle Twinkle: C-C-G-G-A-A-G, fingers 1-1-5-5-3-3-2-1-5-5-4-4-3.
These songs embed habits. Transpose to other keys once comfortable in C.
Video Recommendations and Further Resources
Visuals accelerate learning:
- Hoffman Academy YouTube: Beginner hand position videos.
- Josh Wright PianoTV: Technique breakdowns.
- Practice with apps like Simply Piano for feedback.
Record sessions weekly. Join forums on Piano World for feedback.
Conclusion: Your Path to Piano Mastery Starts Here
Consistent finger placement practice transforms beginners into confident players. In 2026, with digital tools and this guide, you're set. Practice daily, stay patient, and enjoy the music. Soon, basic songs will flow effortlessly, opening doors to classics like Beethoven. Keep your hands happy—your future self will thank you!


No comments yet. Be the first!